
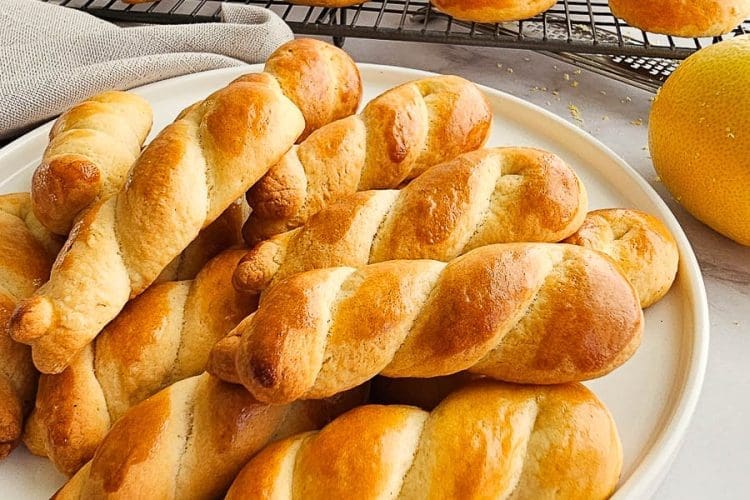
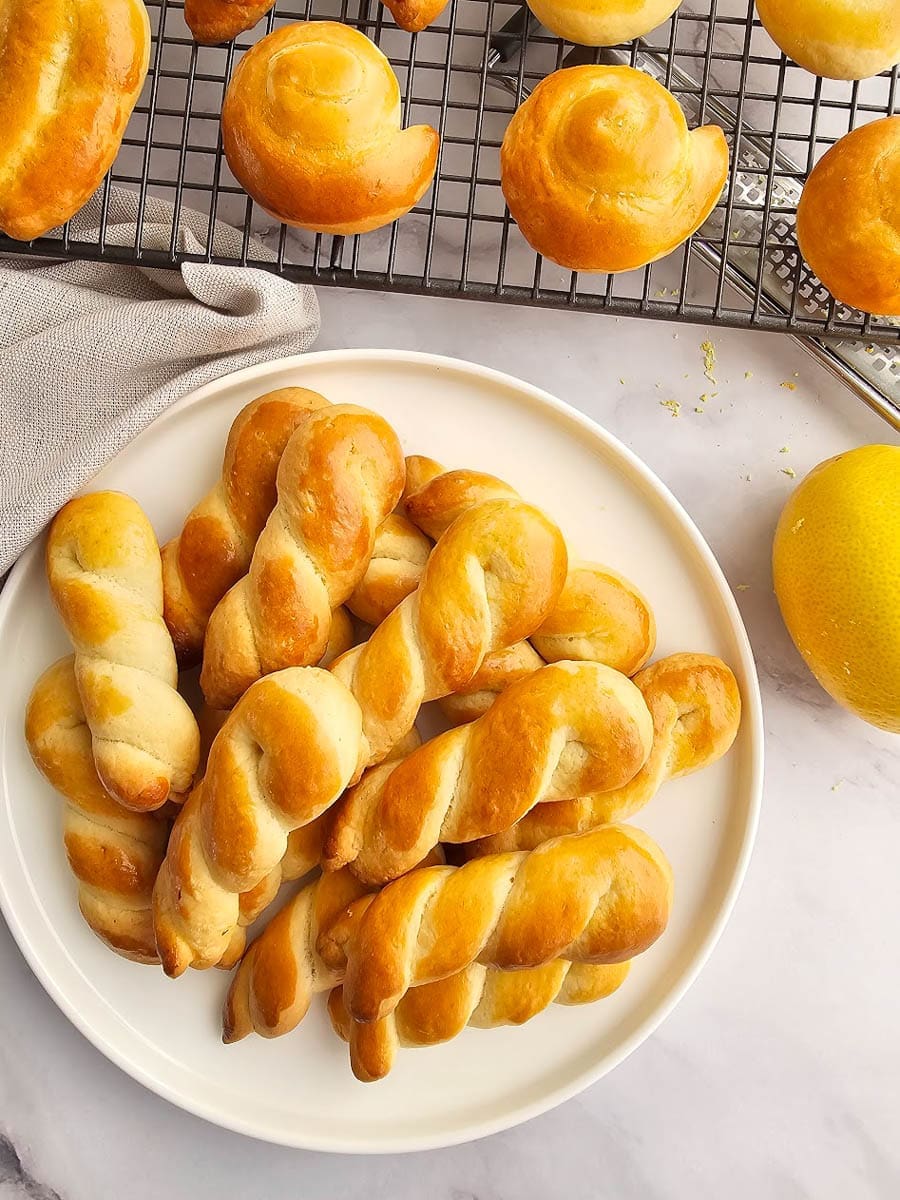
These traditional Greek Easter Cookies are gently infused with brandy, vanilla, and a hint of lemon zest for an unforgettable melt-in-your-mouth experience.
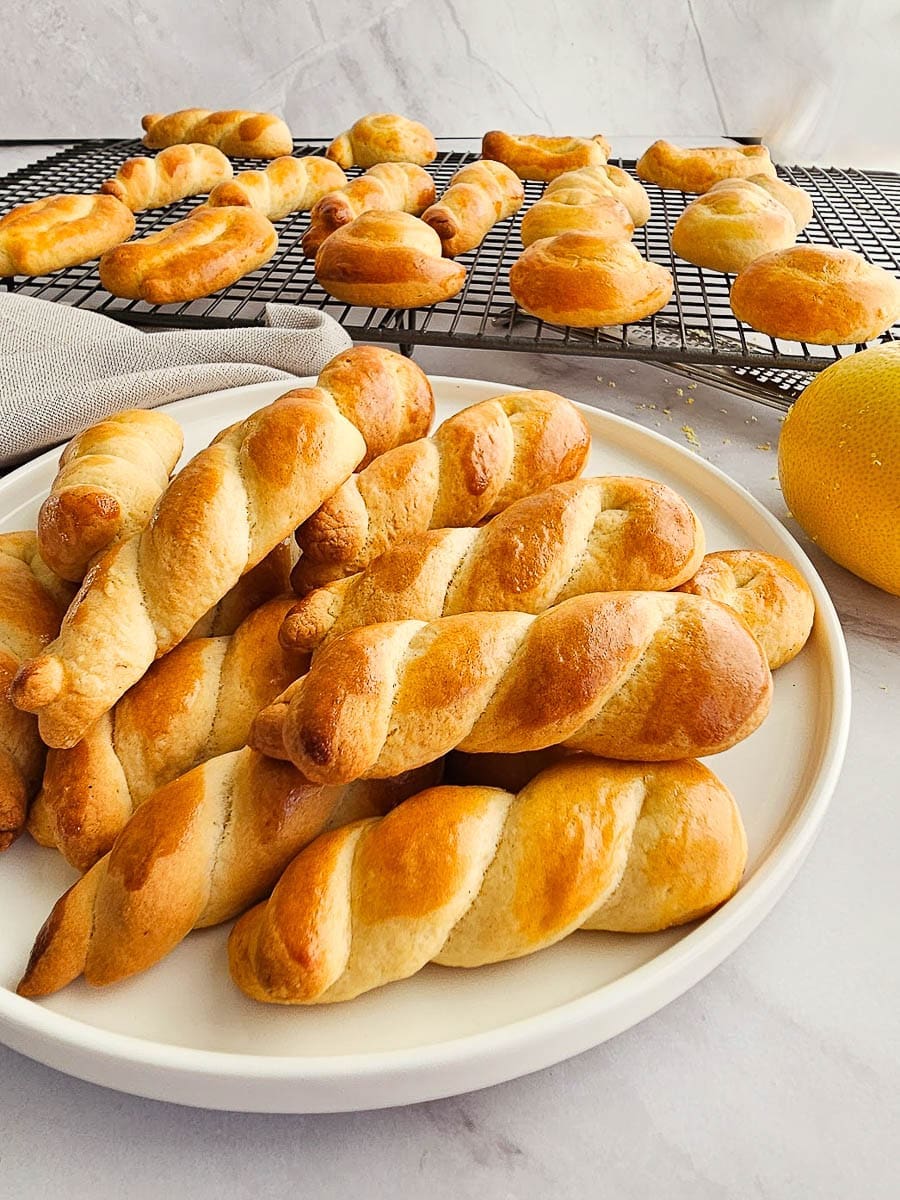
While your typical pantry might contain some version of a shortbread cookie, a typical Greek pantry will have Koulourakia (pronounced koo-loo-RAH-kyah). We make Koulourakia all year round. This version is the Greek Easter version, soft and crumbly on the inside and crunchy on the outside, a little different to the crunchier version of Koulourakia I make all year round, which I will post soon. During Easter, these soft and crumbly Koulourakia make their appearance alongside freshly baked Tsoureki (Greek Easter Sweet Bread) and bright red eggs, together, they create a traditional spread that makes the home feel like Easter.
Greek Easter Cookies Ingredients
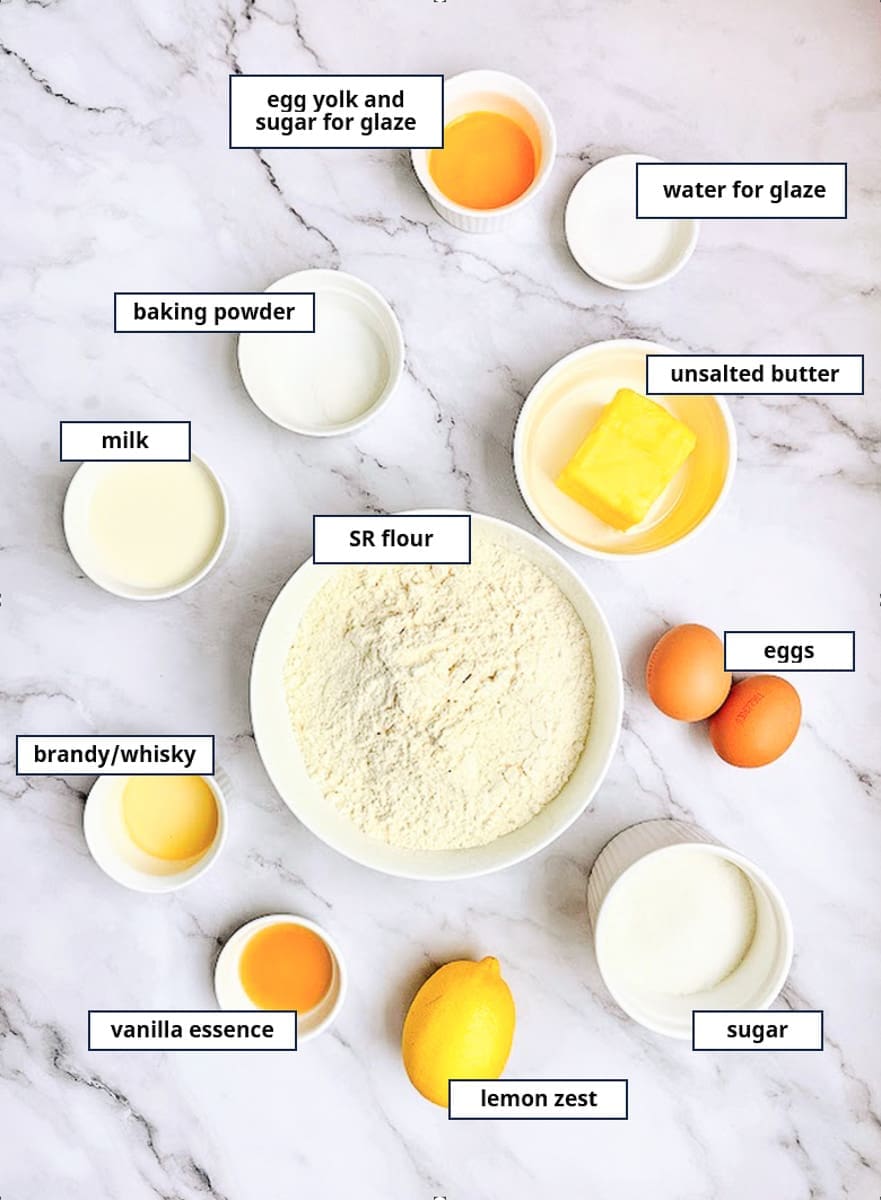
- Unsalted butter: Provides richness and flavour to the cookies. Ensure it’s softened at room temperature for easy mixing.
- White/granulated sugar: Adds sweetness and helps to tenderise the dough.
- Eggs: Provide structure, moisture and richness to the cookies.
- Milk: Use full-cream milk. Full-cream milk adds richness and moisture to the dough, resulting in softer cookies.
- Brandy/whisky: Gives a subtle, warm flavour. Alternatively, substitute with vanilla essence if you do not want to use alcohol.
- Vanilla extract: Adds a sweet and aromatic flavour. When substituting vanilla flavourings, vanilla essence and vanilla sugar offer a milder vanilla flavour compared to vanilla extract and vanilla powder, so I usually double the amount.
- Lemon zest: Adds a refreshing, citrusy flavour. My mum always makes Koulourakia with lemon zest, but orange zest can also be used as a substitute, if preferred. When zesting, be careful to only grate the outer, yellow layer as the white pith has a bitter flavour.
- Baking powder: Although the recipe calls for self-raising flour, my mum always adds a touch of baking powder. Baking powder ensures that the cookies rise sufficiently and have a light and airy texture.
- Self-raising flour: For a light and fluffy texture.
- Egg yolk glaze with sugar: Mixing egg yolk with sugar creates a slightly sweeter glaze that adds a touch of sweetness to the koulourakia while also contributing to a golden colour when baked. The sugar caramelises slightly, enhancing the appearance of the cookies. Add a touch of water to make it easier to brush on.
How to make Greek Easter Cookies (Koulourakia)
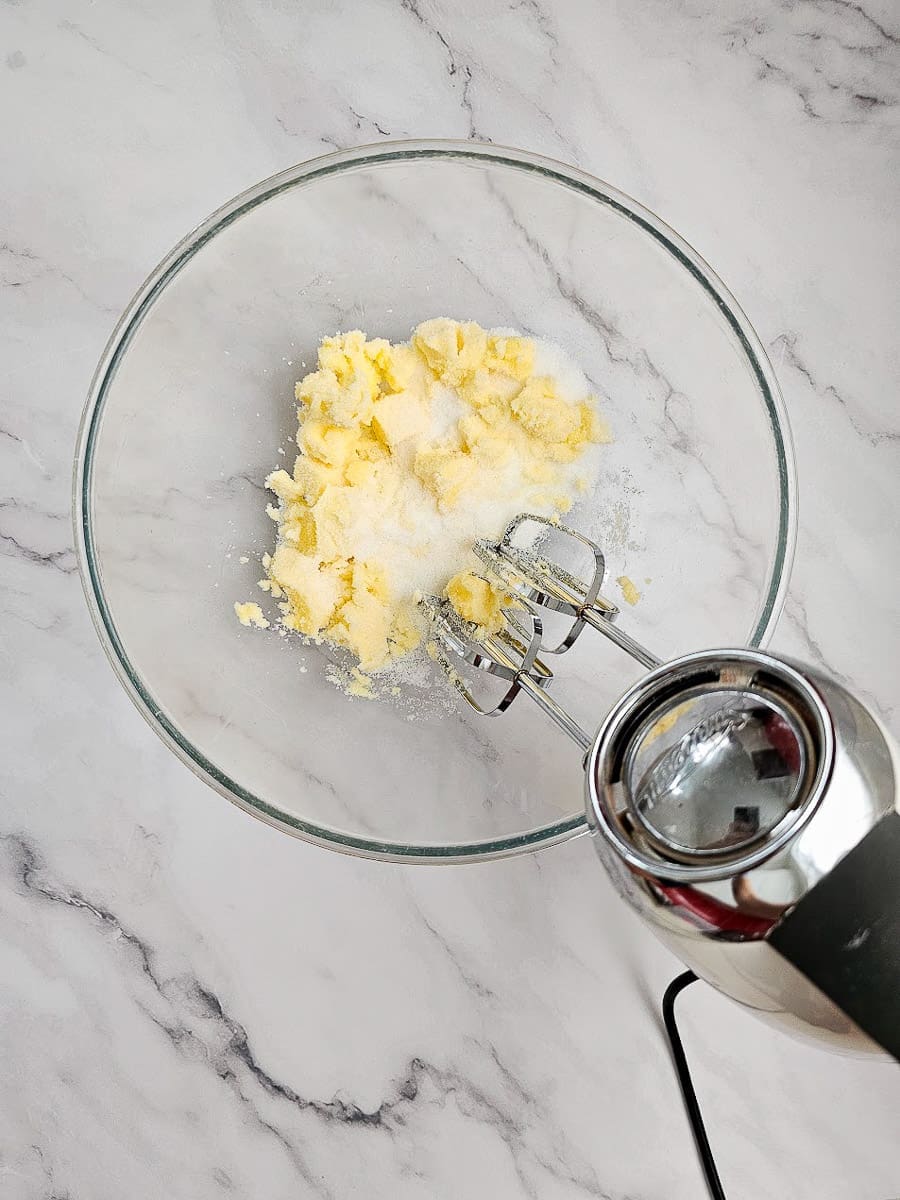
1. Cream butter and sugar. Beat on high speed for 3-5 minutes until mixture is creamy.
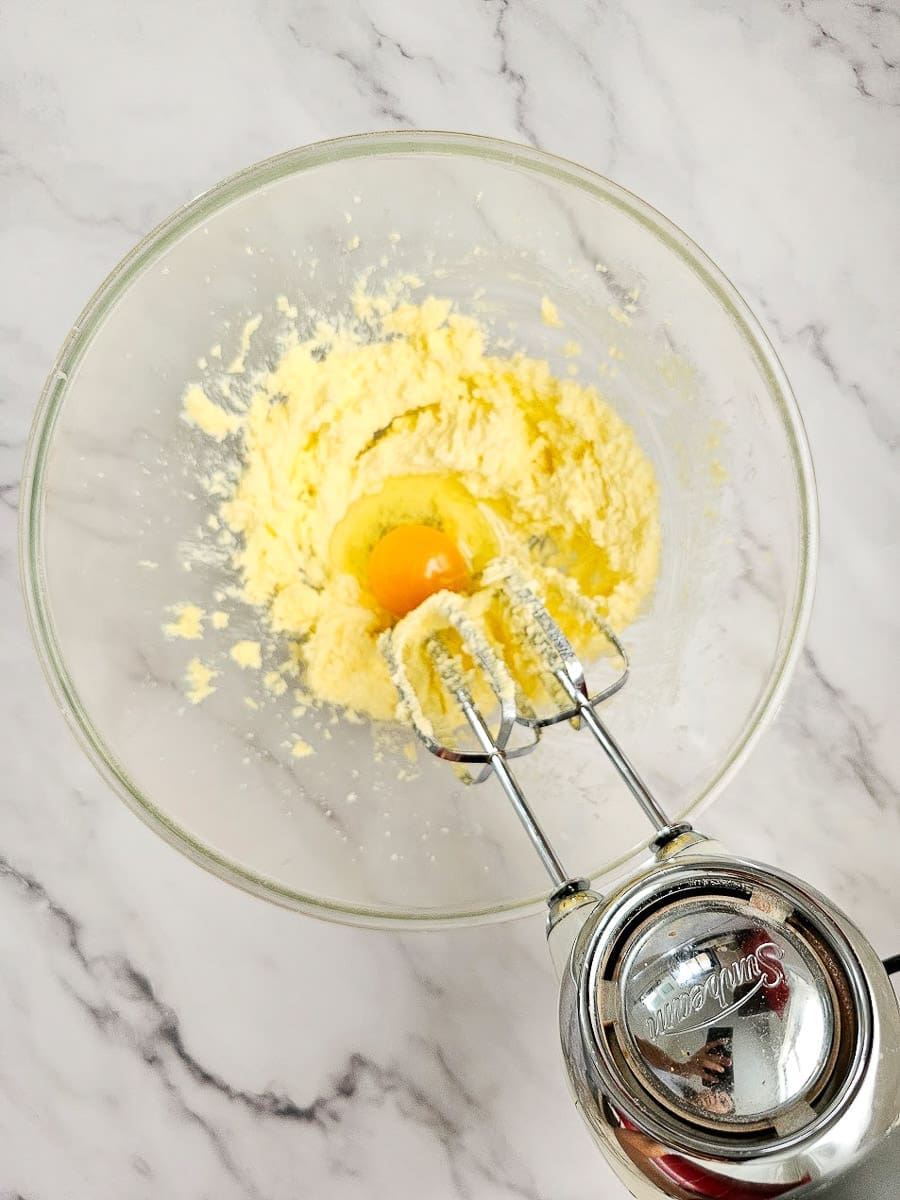
2. Add eggs one at a time and beat on medium speed for a minute in between each addition.
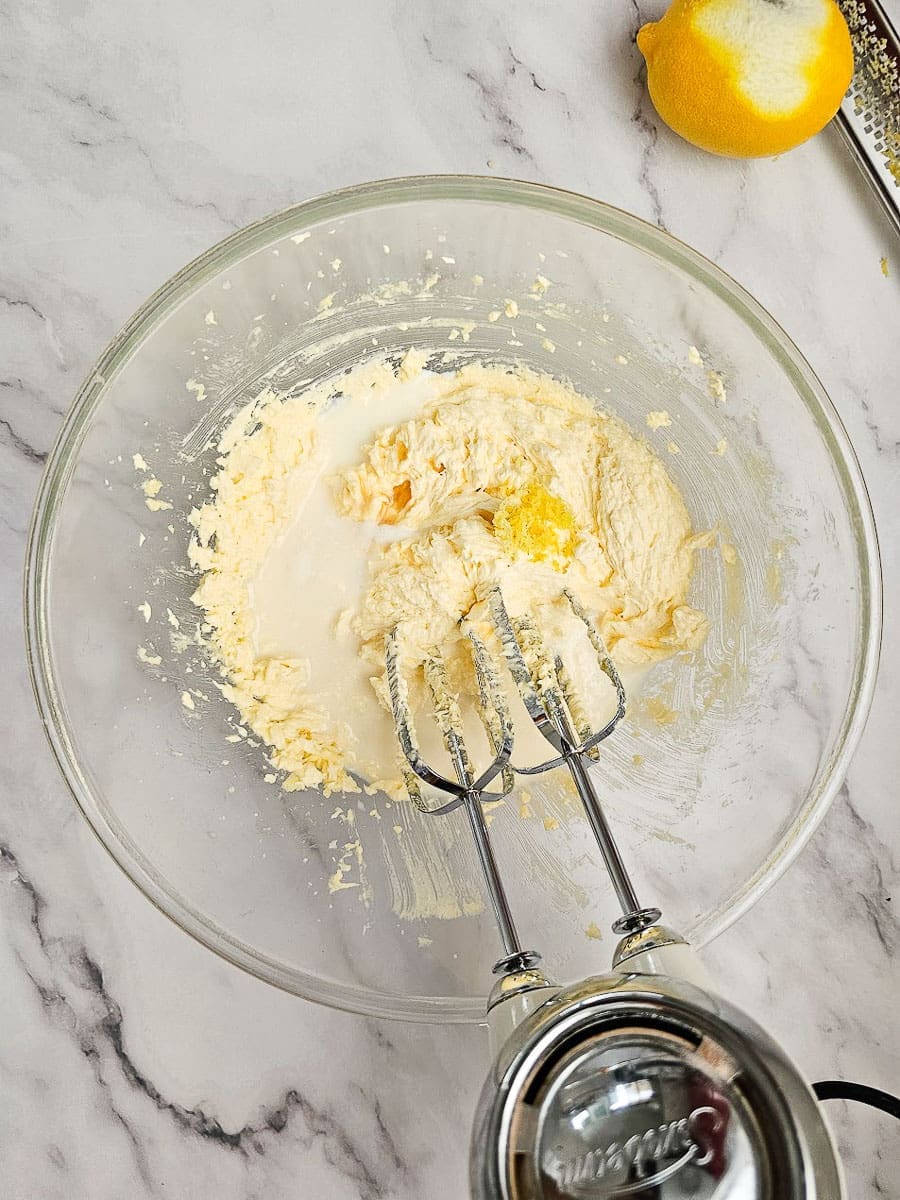
3. Add milk, brandy, vanilla extract, lemon zest and baking powder. Beat to combine.
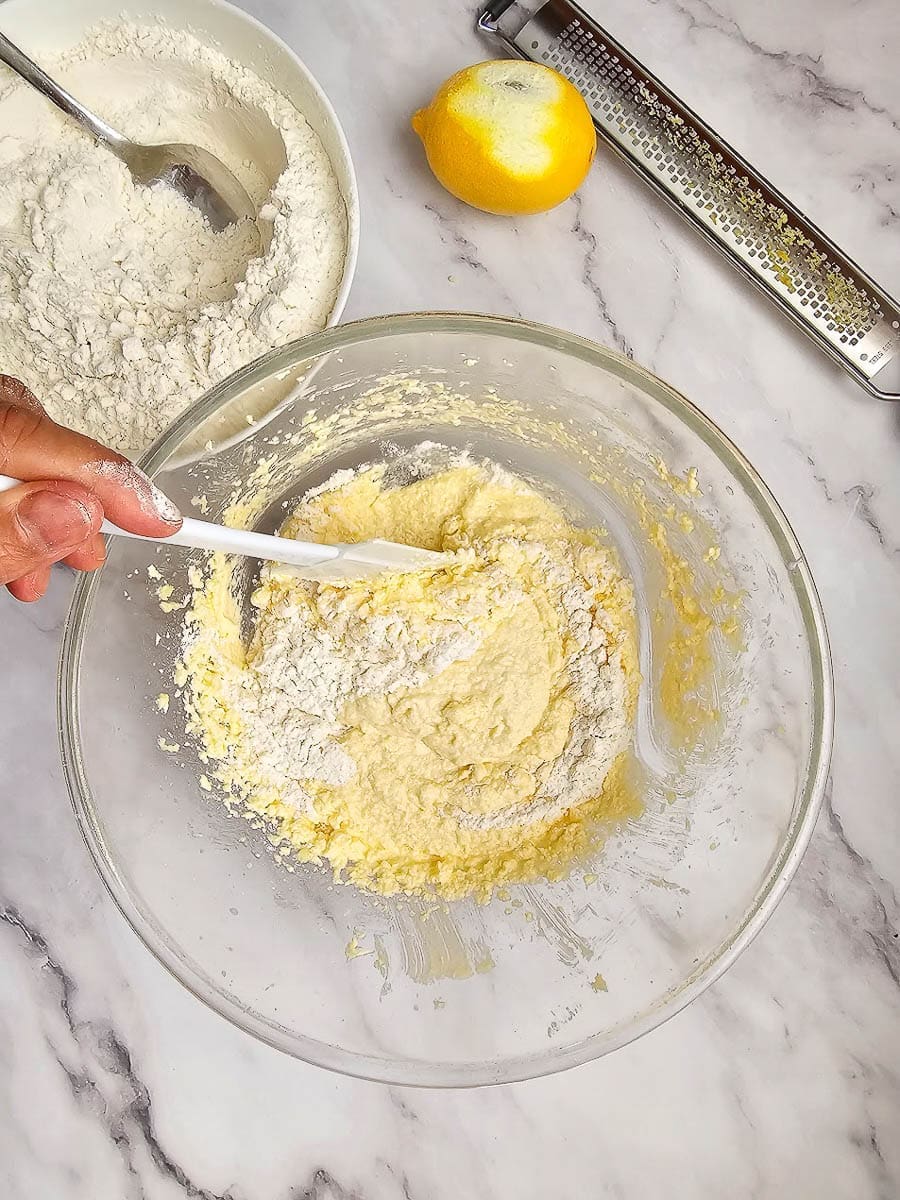
4. Using a spatula, gently fold in the remaining flour, one tablespoon at a time, until the right consistency has been achieved.
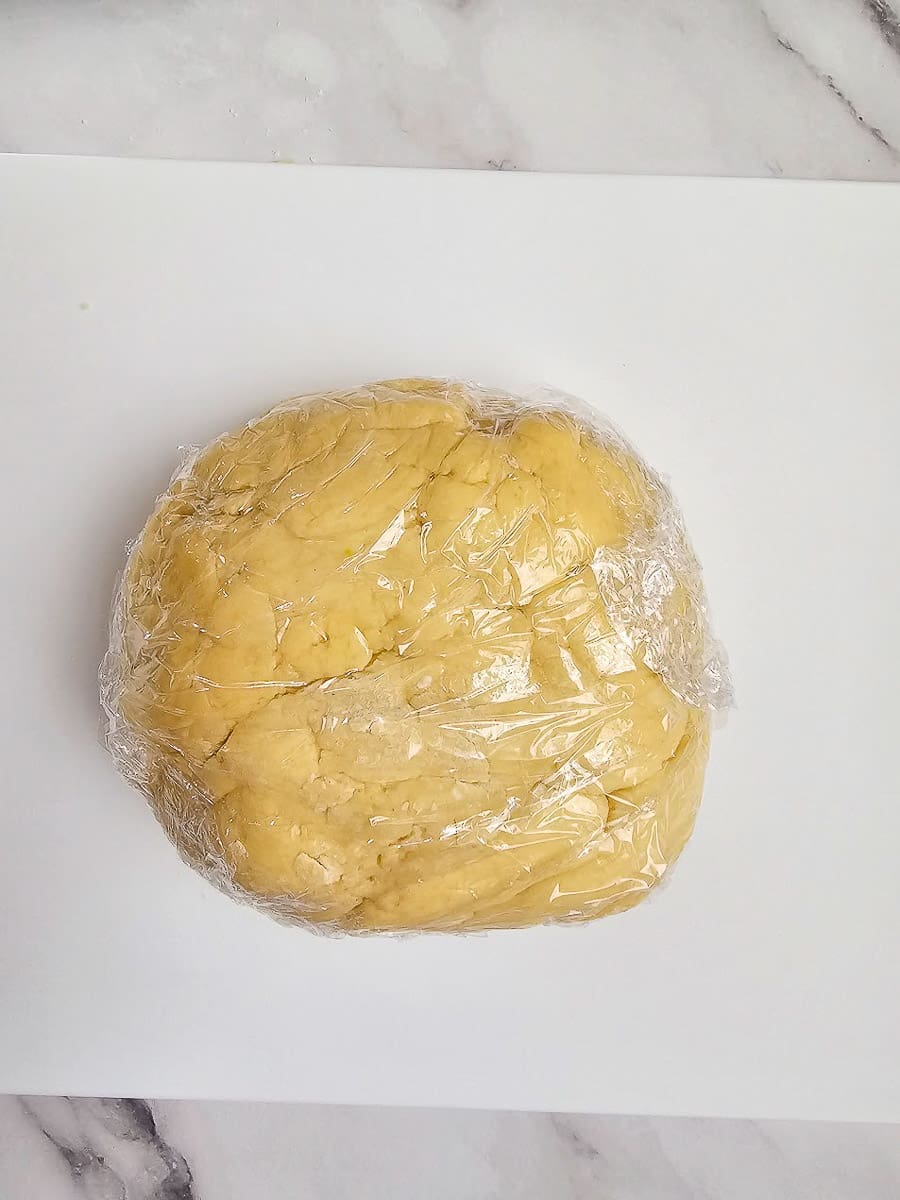
5. If you have time, wrap the dough with cling wrap and chill for 30 minutes.
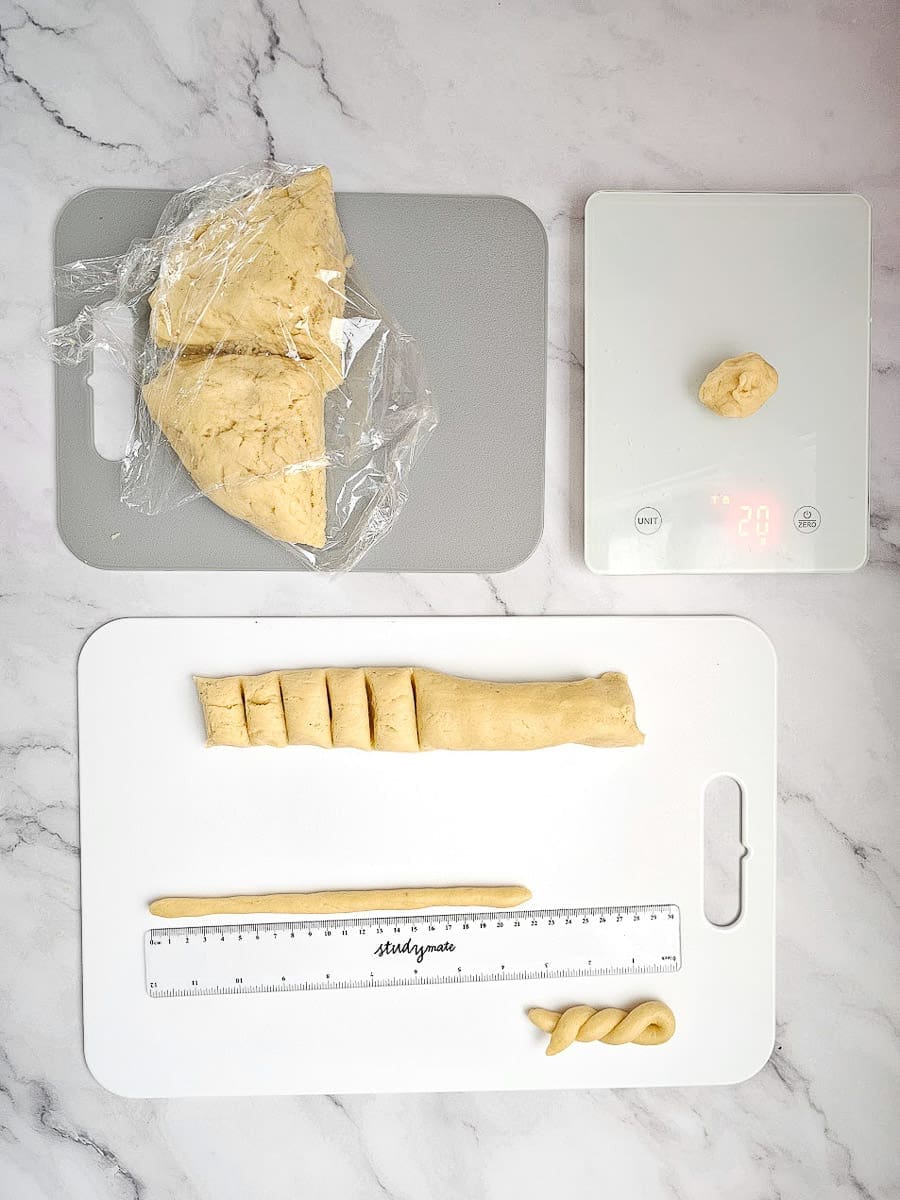
6. Take tablespoons of the dough and roll into various shapes. I usually use 20 grams /0.7 ounces of dough and roll them 22-23cm/ 9 inches in length, then shape into various shapes.
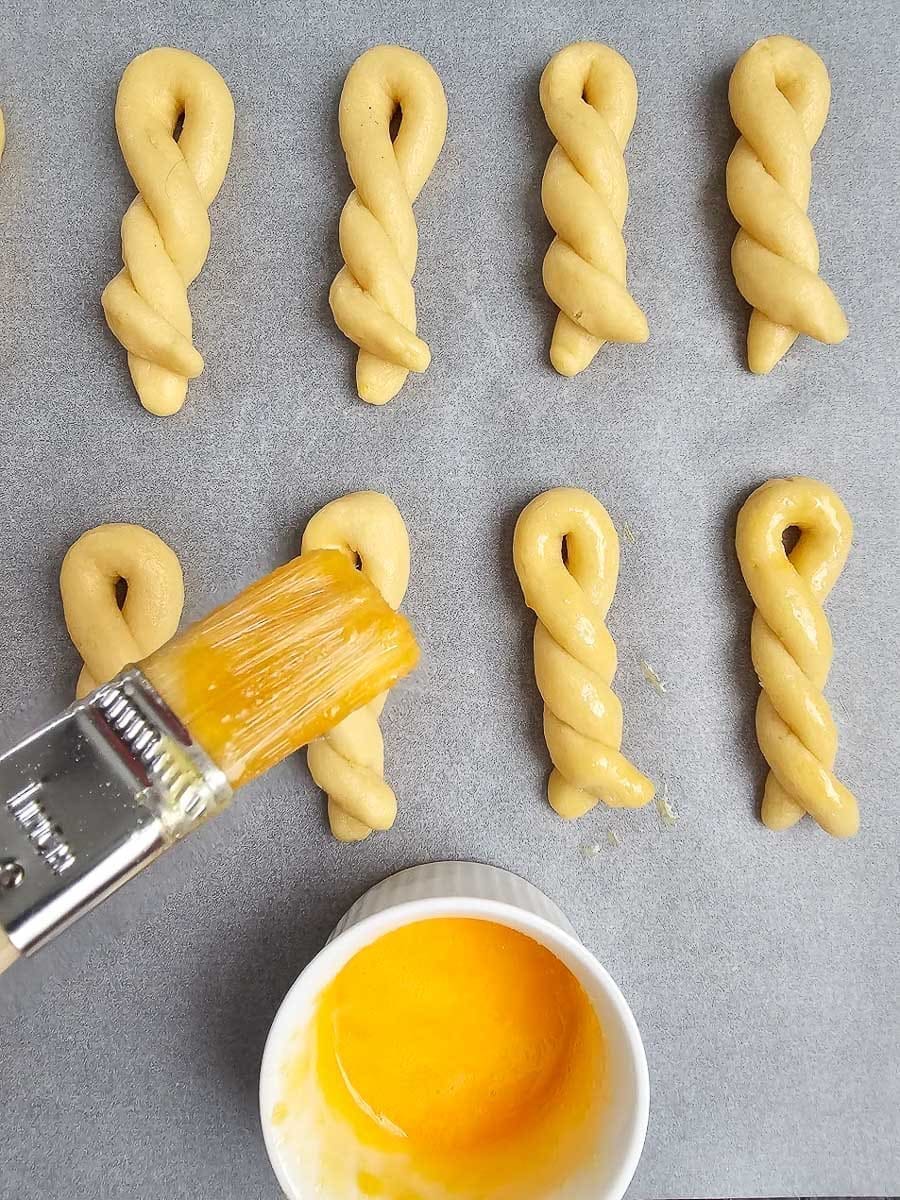
7. Place on lined baking tray and brush with glaze.
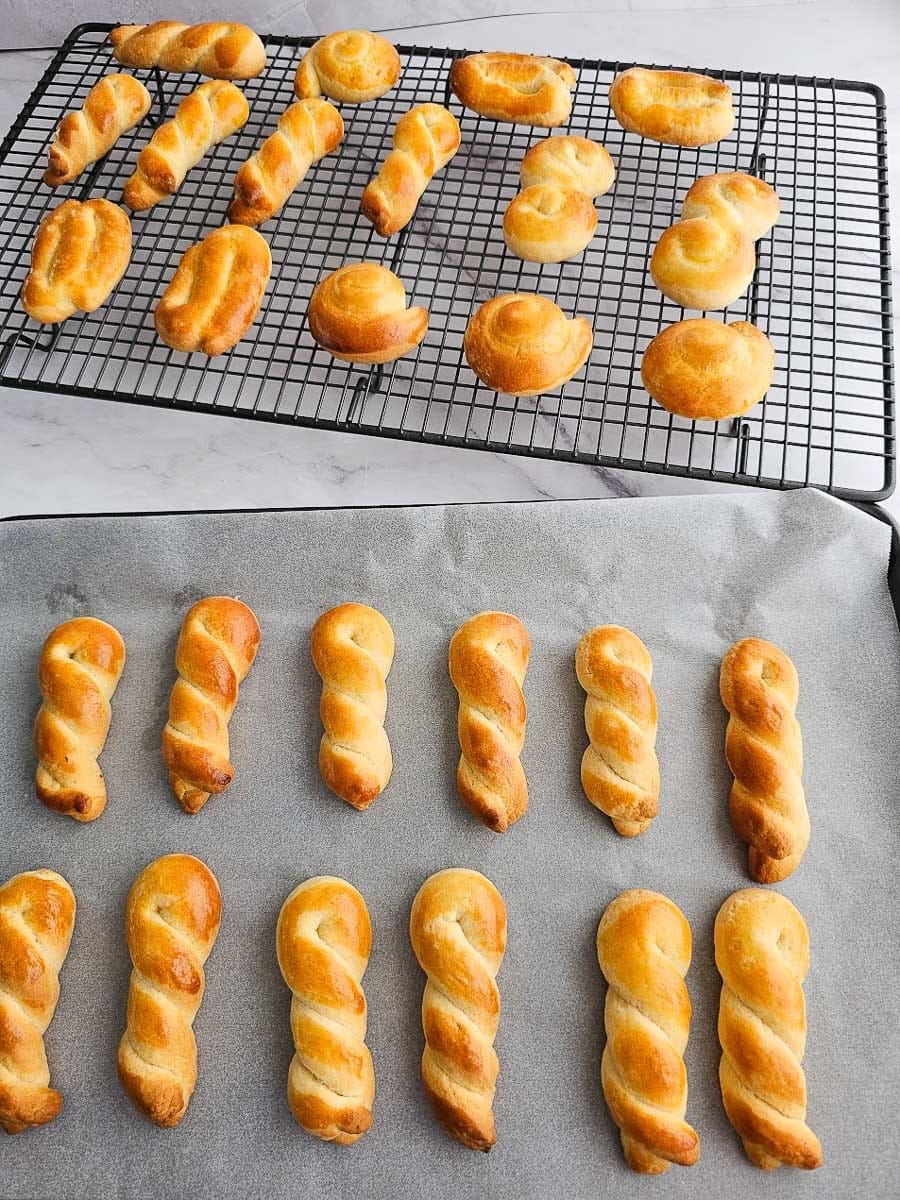
8. Bake for 12-14 minutes or until golden. Cool on wire rack.
Tips for making Greek Easter Cookies (Koulourakia)
Use scales to measure your ingredients
When measuring ingredients for baking, such as flour, I prefer to use kitchen scales for more accurate measurements. This is especially important for achieving the right balance of ingredients in Koulourakia, contributing to their perfect texture.
Room temperature ingredients
Allow ingredients like butter and eggs to come to room temperature before starting. This helps to create a smoother dough, ensuring proper incorporation of ingredients and contributing to the perfect dough consistency.
Let your dough rest
Let your Koulourakia dough rest before shaping. Allowing the dough to rest for about 30 minutes in the fridge before shaping makes it easier to shape the dough. This resting period also allows the flavours to develop, resulting in a tastier final product.
How to shape your Greek Easter cookies
When shaping your Koulourakia, do not add flour to your workbench, as the extra flour can make it more difficult to roll the koulourakia into shapes.
My favourite way to shape the dough is twisting the koulourakia into braids. I think they look the best and they are perfect for dipping into your tea or coffee. However, feel free to experiment with all sorts of shapes: twisted, snail, s-shape, boat, etc.
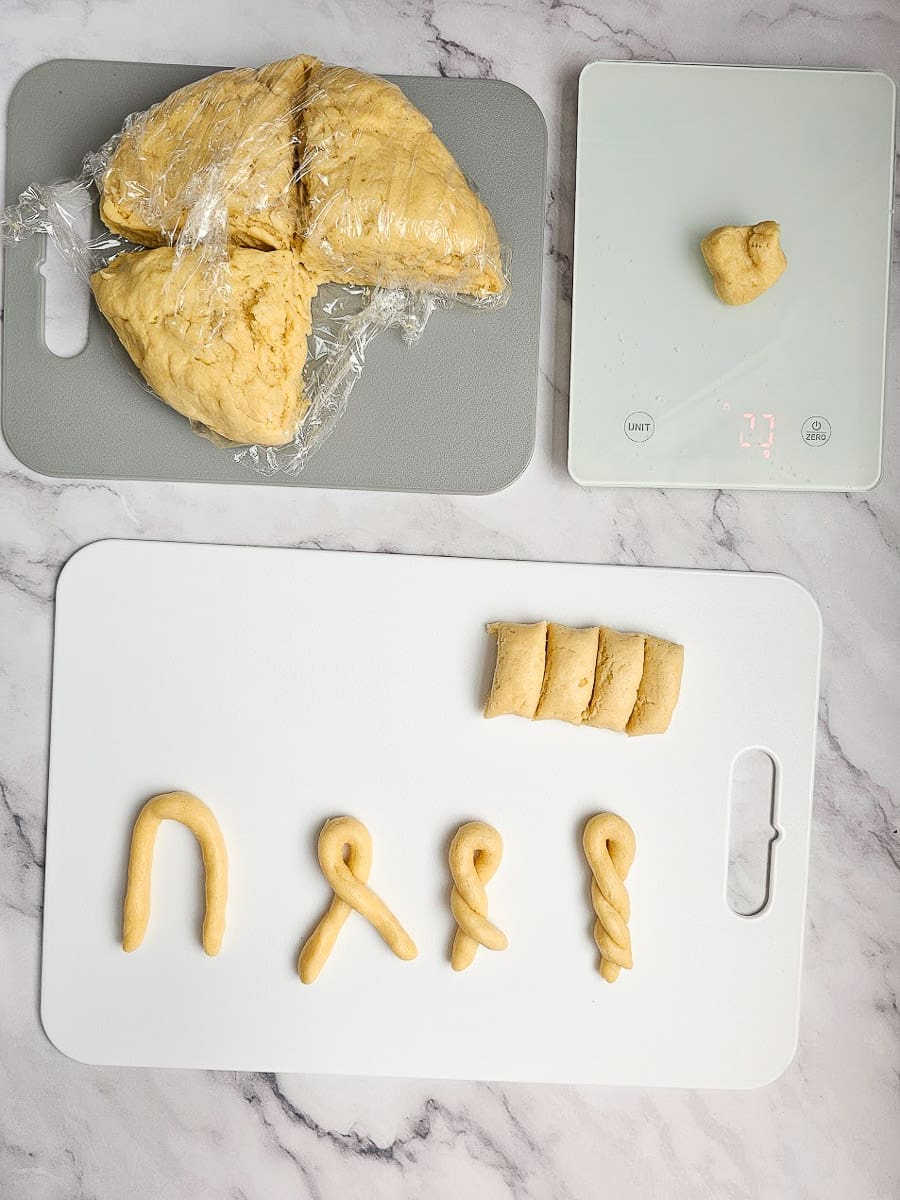
How to braid Koulourakia
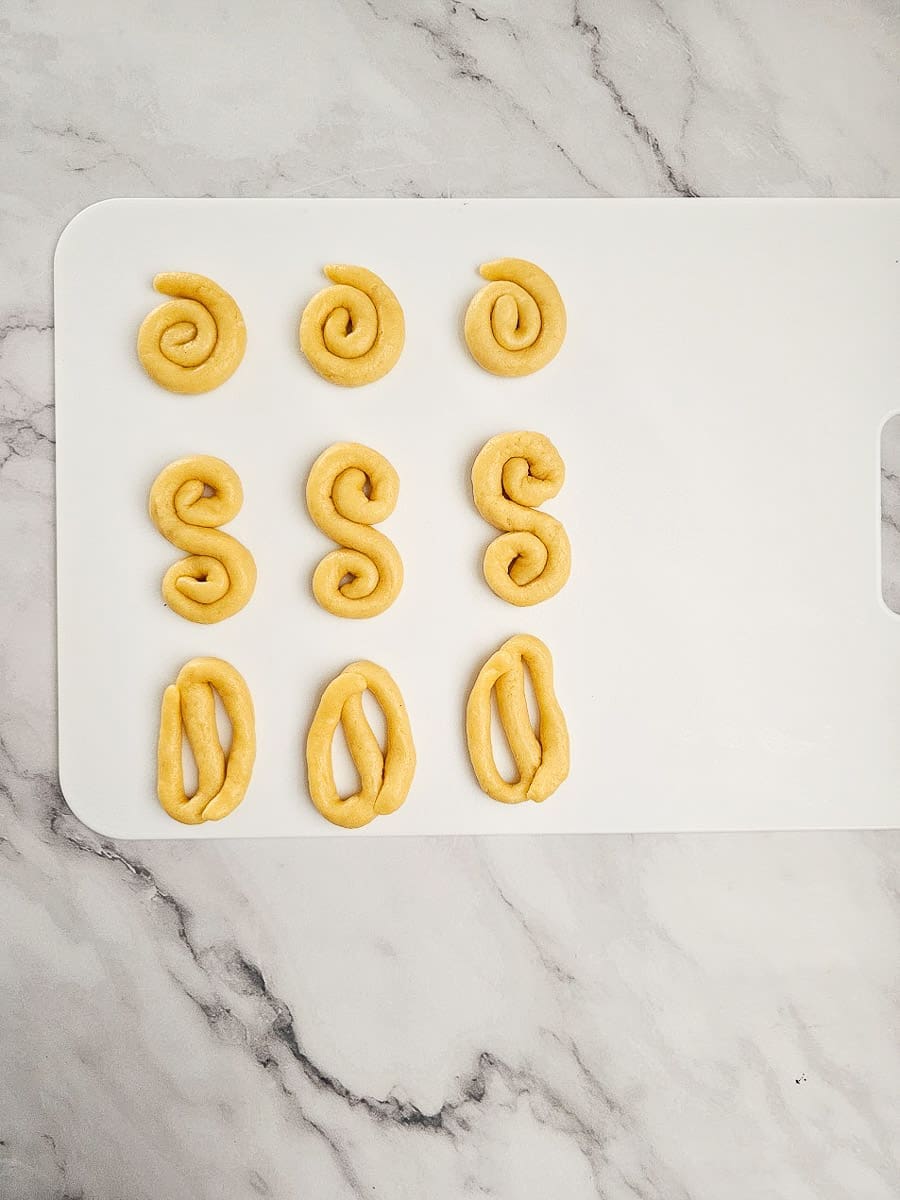
How to shape Koulourakia: Snail, S-shape, boat
Why did my cookies crack?
Cracking in Koulourakia is often due to the dough being too dry or lacking sufficient moisture, leading to cracks during baking as the cookies expand.
Follow these tips to minimise the risk of your cookies cracking.
Ensure Proper Dough Moisture: Aim for a dough that is smooth and slightly sticky, but not overly wet or dry. Adjust the moisture content by adding small amount of milk if the dough feels too dry, or incorporate a bit more flour if it’s too sticky.
Gentle Handling: Avoid overworking the dough when shaping the cookies. Handle it gently to minimise stress on the dough, which can contribute to cracking during baking.
Proper Resting Time: Allow the shaped cookies to rest on the baking sheet for 15 to 30 minutes before baking. This resting time allows the dough to relax, reducing the likelihood of cracks during baking.
Avoid Over-Baking: Bake the cookies at the correct temperature and for the appropriate amount of time. Over-baking can dry out the cookies, increasing the risk of cracking.
Proper Oven Temperature: Ensure your oven is preheated to the correct temperature before baking. Baking at too high of a temperature can cause the exterior of the cookies to set too quickly, leading to cracks as they expand.
Storing
Just like most cookies that come straight out of the oven, they are a little soft. Let them cool down before storing and then store in an airtight container at room temperature. Koulourakia are best enjoyed within 1 to 2 weeks of baking for optimal freshness and flavour. However, they can still be edible for up to 3 weeks, if stored in an airtight container.
Freezing the dough: You can store frozen Koulourakia dough in the freezer for up to 2 to 3 months. Just prepare the dough, wrap in glad wrap, and store in a tightly sealed freezer bag or container.
Freezing the baked cookies: If you want to extend their shelf life, Koulourakia can be frozen for up to 2 to 3 months. Place them in a freezer-safe container or resealable plastic bag with layers separated by parchment paper to prevent sticking. Thaw them at room temperature before serving.

)
Greek Easter Cookies (Koulourakia)
50
cookies1
hour25
minutes30
minutes1
hour55
minutesThese traditional Greek Easter Cookies are gently infused with brandy, vanilla, and a hint of lemon zest for an unforgettable melt-in-your-mouth experience.
Keep the screen of your device on
Ingredients
125 grams unsalted butter, softened (4.41 oz)
3/4 cup white/granulated sugar (150 grams / 6 oz)
2 eggs
1/2 cup full cream milk
2 teaspoons brandy/whisky or 1 tbspn vanilla essence (note 1)
1/2 teaspoon vanilla extract or 1 tsp vanilla essence (note 2)
1 teaspoon grated lemon zest (note 3)
1/4 teaspoon baking powder
525-600 grams self-raising flour, sifted (3 ½ – 4 cups/ 18-21 oz)
- For glaze (note 4)
1 egg yolk
1/4 teaspoon sugar
1/4 teaspoon water
Instructions
- Preheat oven to 180° C / 350°F.
- Cream butter and sugar in a large bowl. Beat on high speed for 3-5 minutes until mixture is creamy.
- Add eggs one at a time and beat on medium speed for a minute in between each addition.
- Add milk, brandy, vanilla extract, lemon zest and baking powder. Beat to combine.
- On low speed, gradually add 2 cups of sifted flour to the mixture.
- Using a spatula, gently fold in the remaining flour, one tablespoon at a time, until the right consistency has been achieved. The dough should be soft but not too sticky as you do not want the dough to stick to your hands when shaping. Be careful not to add too much flour, as you do not want your biscuits to crack when baked. (Note 5)
- If you have time, wrap the dough with cling wrap and chill for 30 minutes. (Note 6)
- Take tablespoons of the dough and roll into various shapes. I usually use 20 grams /0.7 ounces of dough and roll them 22-23cm/ 9 inches in length, then shape into various shapes (see photos).
- Place on lined baking tray and brush with glaze.
- Bake for 12-14 minutes or until golden. (Note 7)
- Cool on baking tray for a few minutes then transfer to wire rack to cool completely.
- Store in airtight container for up to three weeks.
Notes
- Notes: 1 Tablespoon= 20 ml / 0.7 oz 1 Cup= 250 ml / 8.45 fl oz
- 1. Substitute with vanilla essence if you do not want to use alcohol.
- 2. When substituting vanilla flavourings, vanilla essence and vanilla sugar offer a milder vanilla flavour compared to vanilla extract and vanilla powder, so I usually double the amount.
- 3. Orange zest can be used as a substitute if preferred. When zesting, be careful to only grate the outer yellow layer, as the white pith has a bitter flavour.
- 4. You may need to double the egg yolk glaze if you run out.
- 5. Mix until the ingredients have just combined. Do not overwork the dough as you want your cookies to be light and crumbly.
- 6. Allowing the dough to rest for about 30 minutes in the fridge before shaping makes it easier to shape the dough. This resting period also allows the flavours to develop, resulting in a tastier final product.
- 7. I usually bake one tray while shaping the next batch. If using two baking trays simultaneously, rotate them halfway through baking by placing the bottom tray on the top rack and vice versa to ensure even cooking.
- 8. Store in an airtight container at room temperature. Koulourakia are best enjoyed within 1 to 2 weeks of baking for optimal freshness and flavour. However, they can still be edible for up to 3 weeks, if stored properly.
Did you make this recipe?
Tag @mumsgreekrecipes on Instagram and hashtag it with
Like this recipe?
Follow @mumsgreekrecipes on Pinterest